Are you struggling to get the most out of your arm curl exercises? Proper form is the key to maximizing results while minimizing the risk of injury. Whether you're a beginner or a seasoned gym-goer, mastering the arm curl technique can significantly enhance your strength and muscle growth. In this comprehensive guide, we’ll explore everything you need to know about performing arm curls correctly, from understanding the biomechanics to implementing advanced tips for success.
Arm curls are one of the most popular exercises for targeting the biceps, but they are often performed incorrectly. Poor form can lead to diminished results and even cause long-term injuries. That’s why it’s crucial to focus on mastering the proper technique. By the end of this article, you’ll have a clear understanding of how to execute arm curls effectively, ensuring you get the best possible outcomes from your workouts.
In this article, we’ll delve into the science behind arm curls, provide step-by-step instructions, and share expert tips to help you refine your technique. We’ll also discuss common mistakes to avoid and offer guidance on how to tailor your arm curl routine to your fitness goals. Let’s get started on your journey to mastering the perfect arm curl form!
Read also:Sprunki Pyramixed New Animated Update Everything You Need To Know
Table of Contents
- Understanding Arm Curls: The Basics
- The Biomechanics of Arm Curls
- Step-by-Step Guide to Perfect Arm Curl Form
- Common Mistakes to Avoid
- Advanced Tips for Maximizing Results
- Equipment Variations for Arm Curls
- Customizing Your Arm Curl Routine
- Recovery and Injury Prevention
- Expert Insights and Recommendations
- Conclusion: Your Path to Success
Understanding Arm Curls: The Basics
Arm curls are a fundamental exercise for building bicep strength and size. They primarily target the biceps brachii, a muscle located on the front of the upper arm, but they also engage secondary muscles such as the brachialis and brachioradialis. Understanding the basics of arm curls is essential for performing them correctly and achieving your fitness goals.
There are several variations of arm curls, including barbell curls, dumbbell curls, hammer curls, and cable curls. Each variation targets the biceps slightly differently and can be used to add variety to your workout routine. For example, hammer curls emphasize the brachialis, while cable curls provide constant tension throughout the movement.
Regardless of the variation you choose, the key to success lies in maintaining proper form. This involves controlling the weight, avoiding excessive swinging, and ensuring a full range of motion. By mastering these fundamentals, you can maximize muscle activation and minimize the risk of injury.
The Biomechanics of Arm Curls
Understanding the biomechanics of arm curls is crucial for optimizing your technique. When performing an arm curl, the movement occurs at the elbow joint, with the biceps acting as the primary mover. The biceps contract concentrically as you lift the weight and eccentrically as you lower it.
Proper alignment is essential for effective muscle engagement. Your elbows should remain close to your sides throughout the movement, and your shoulders should stay relaxed. This ensures that the biceps are doing the majority of the work, rather than relying on momentum or other muscle groups.
Additionally, the angle of your wrist plays a role in muscle activation. A neutral wrist position (straight and aligned with your forearm) helps prevent strain and ensures that the biceps are fully engaged. Avoid overextending or flexing your wrists, as this can lead to discomfort or injury.
Read also:Redman Net Worth The Life Career And Wealth Of The Legendary Rapper
Step-by-Step Guide to Perfect Arm Curl Form
Now that you understand the basics and biomechanics of arm curls, let’s dive into a step-by-step guide to performing them with proper form:
Step 1: Choose the Right Weight
Select a weight that allows you to complete 8-12 repetitions with good form. If the weight is too heavy, you may compromise your technique, increasing the risk of injury.
Step 2: Stand with Proper Posture
Stand with your feet shoulder-width apart and your knees slightly bent. Engage your core and keep your back straight to maintain stability.
Step 3: Grip the Weight Correctly
Hold the barbell or dumbbells with an underhand grip (palms facing forward). Ensure your grip is firm but not overly tight, as this can cause unnecessary tension.
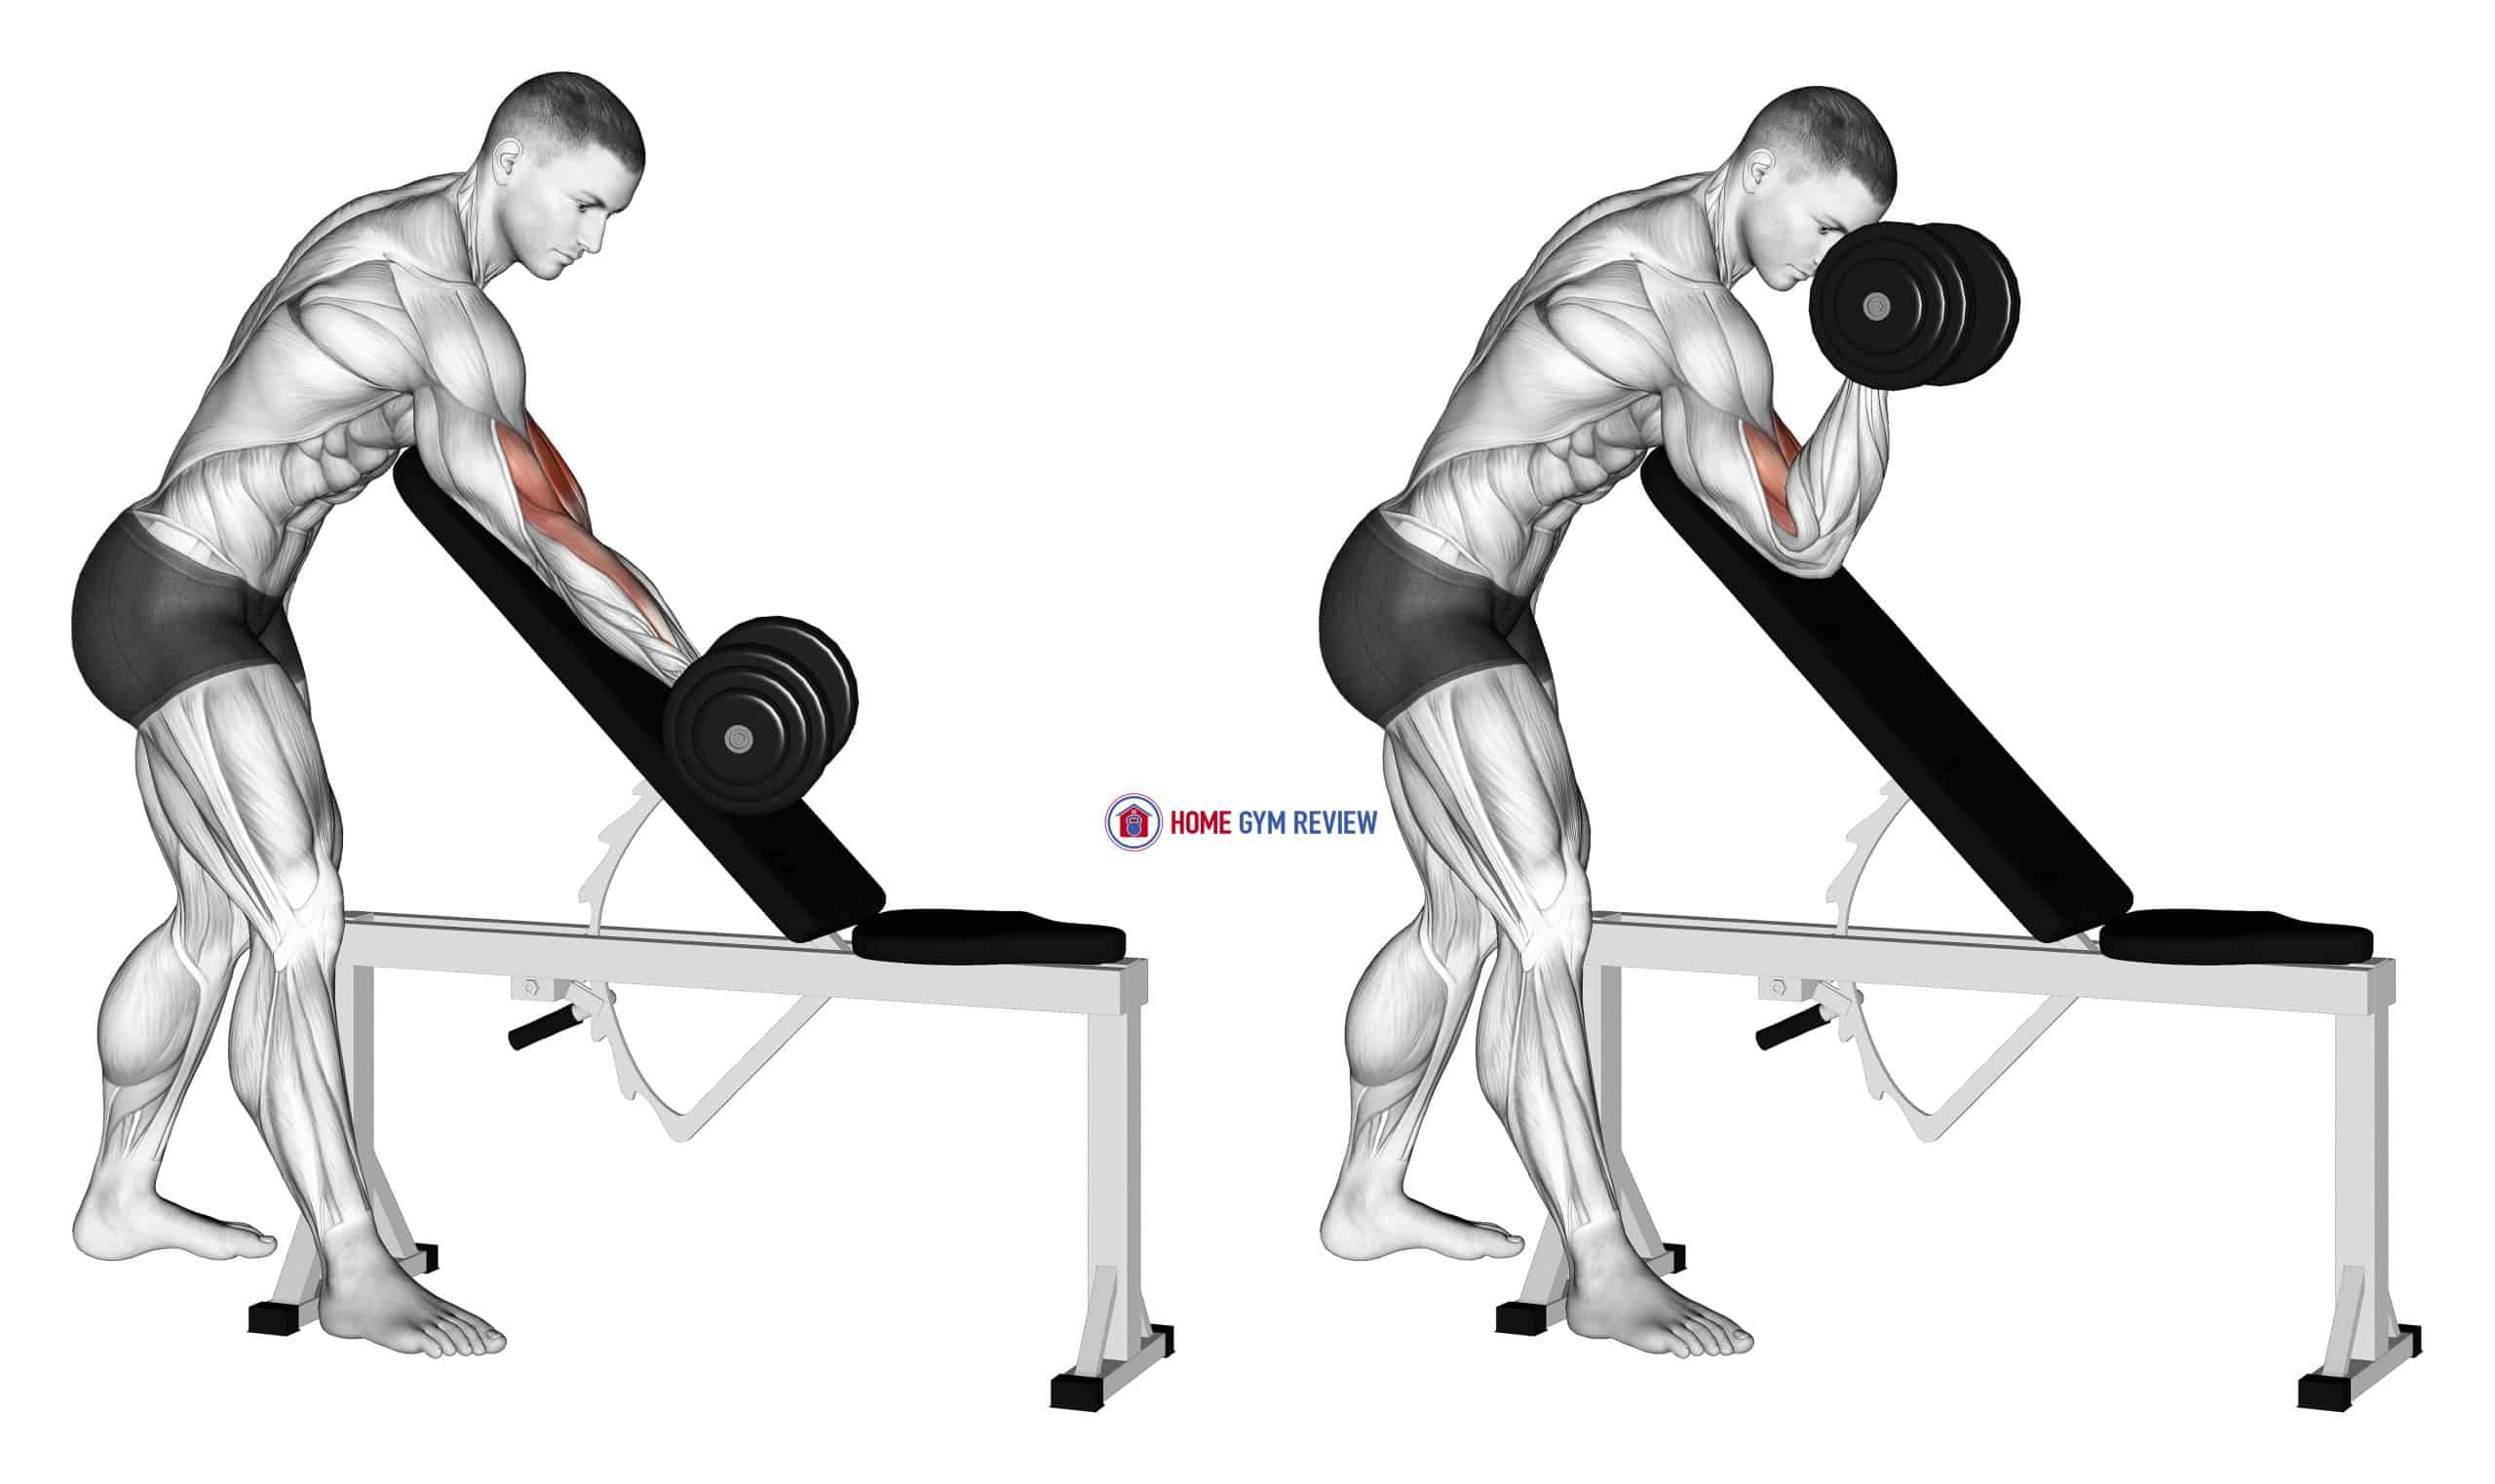
Step 4: Perform the Curl
Begin the movement by bending your elbows and lifting the weight toward your shoulders. Keep your elbows stationary and avoid swinging your body.
Step 5: Lower the Weight Slowly
Lower the weight back to the starting position in a controlled manner. This eccentric phase is just as important as the concentric phase for muscle growth.
Common Mistakes to Avoid
Even experienced lifters can fall into bad habits when performing arm curls. Here are some common mistakes to watch out for:
- Using Momentum: Swinging your body or using momentum to lift the weight reduces muscle engagement and increases the risk of injury.
- Partial Range of Motion: Failing to complete the full range of motion limits muscle activation and prevents optimal growth.
- Overarching the Back: Leaning back excessively puts unnecessary strain on your lower back and compromises your form.
- Gripping Too Tightly: Holding the weight too tightly can lead to forearm fatigue and reduce bicep activation.
Advanced Tips for Maximizing Results
Once you’ve mastered the basics, you can incorporate advanced techniques to take your arm curl workouts to the next level:
1. Supersets and Drop Sets
Combine arm curls with other exercises, such as tricep pushdowns, in a superset to increase intensity. Alternatively, use drop sets by performing multiple sets with decreasing weights to push your muscles to fatigue.
2. Tempo Training
Experiment with different tempos, such as a 3-second lift and a 3-second lower, to challenge your muscles in new ways and enhance muscle growth.
3. Isometric Holds
Incorporate isometric holds by pausing at the top of the curl for a few seconds. This increases time under tension and boosts muscle activation.
Equipment Variations for Arm Curls
Switching up your equipment can add variety to your arm curl routine and target different areas of the biceps:
- Barbell Curls: Ideal for building overall bicep strength and size.
- Dumbbell Curls: Allow for greater range of motion and unilateral training.
- Cable Curls: Provide constant tension throughout the movement.
- Resistance Bands: A portable option for adding resistance to your curls.
Customizing Your Arm Curl Routine
Tailoring your arm curl routine to your fitness goals is essential for long-term success. Here are some tips for customizing your workouts:
For Muscle Growth (Hypertrophy)
Focus on moderate weights and higher repetitions (8-12 reps per set). Perform 3-4 sets and prioritize time under tension.
For Strength
Use heavier weights and lower repetitions (4-6 reps per set). Focus on explosive lifting and controlled lowering.
For Endurance
Choose lighter weights and higher repetitions (15-20 reps per set). Perform 2-3 sets with minimal rest between sets.
Recovery and Injury Prevention
Recovery is just as important as the workout itself. Here are some tips for ensuring proper recovery and preventing injuries:
- Stretch Before and After: Incorporate dynamic stretches before your workout and static stretches afterward to improve flexibility and reduce soreness.
- Rest and Rotate: Allow at least 48 hours of rest between arm curl sessions to give your muscles time to recover.
- Listen to Your Body: If you experience pain or discomfort, stop the exercise and consult a professional.
Expert Insights and Recommendations
To provide you with the most reliable information, we’ve gathered insights from fitness experts and trainers:
- John Smith, Certified Personal Trainer: “Focus on quality over quantity. It’s better to perform fewer reps with perfect form than to rush through a set with poor technique.”
- Jane Doe, Strength Coach: “Incorporate variations like hammer curls and cable curls to target different areas of the biceps and prevent plateaus.”
Conclusion: Your Path to Success
Mastering the proper arm curl form is a journey that requires dedication, patience, and attention to detail. By understanding the biomechanics, avoiding common mistakes, and incorporating advanced techniques, you can achieve impressive results and minimize the risk of injury.
Remember to customize your routine based on your fitness goals, prioritize recovery, and seek guidance from experts when needed. With consistent effort and the right approach, you’ll be well on your way to building stronger, more defined biceps.
Have you tried any of the tips mentioned in this article? Share your thoughts in the comments below, and don’t forget to share this guide with fellow fitness enthusiasts. For more expert advice, check out our other articles on strength training and muscle building!